KHPP Full Process
Below are screenshot for KHPP implementation:
Step 1: Payment Method Creation
After a user has entered all the required customer details, they will be taken to the Ezypay Korean Hosted Payment Page (KHPP), where they will be presented with the 'Payment method creation' page.
It is mandatory to enter the card holder's name, and to tick the check box to agree to Ezypay's Terms and Conditions, before the user can proceed to the next step in the KHPP process.
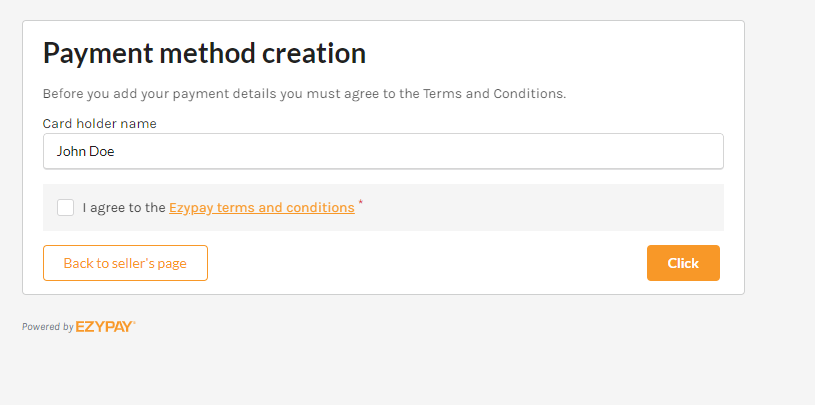
Step 1: Payment Method Creation
Step 2: Agreeing to the Terms and Conditions from NHN KCP
These are the terms and conditions provided by the payment provider in Korea (NHN KCP).
Step 2: Agree to the Terms and Conditions
Step 3: Selecting the Telco Provider
After agreeing to the terms and conditions, the user will be taken to another pop up window, where they have to select which telco provider they are with.
A list of telco providers will be presented to the user, and they will select the one that is applicable to them.
Apart from advising which telco provider they are with, the user will also need to tick box a list of terms and conditions they agree to before they can proceed further on into sign up process.
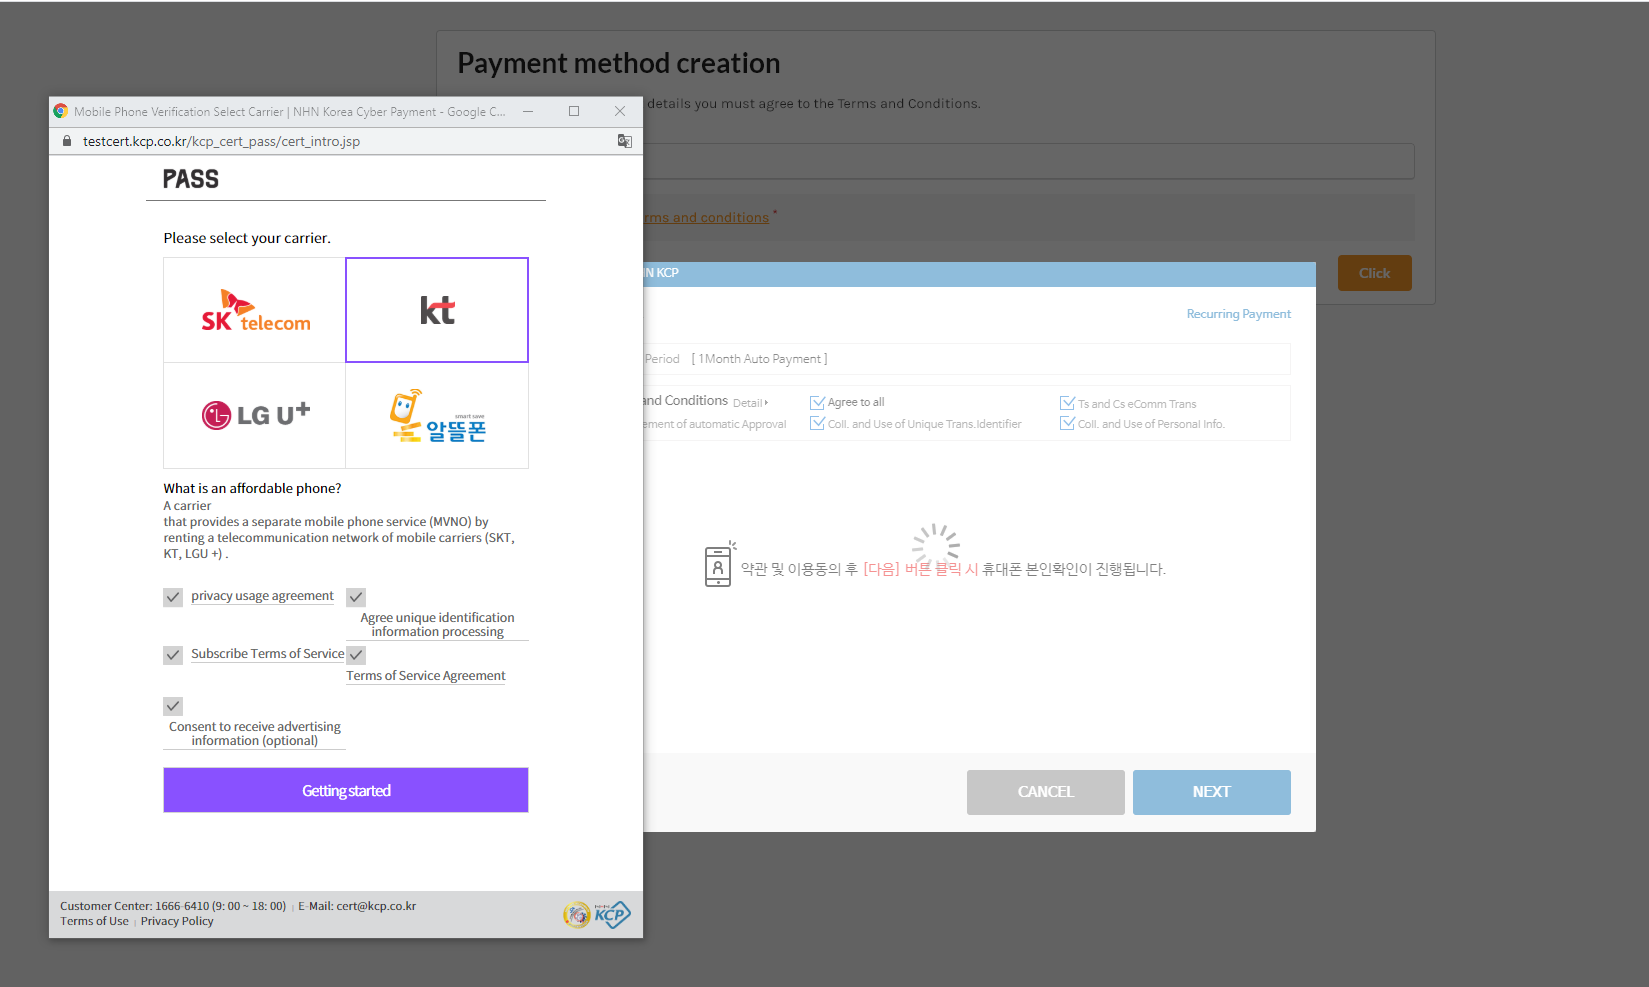
Step 3: Selecting the Telco provider
Step 4: Selecting the Type of Authentication
When a user has selected a telco carrier, they will be presented with 3 types of authentication types.
The selection includes:
- QR Authentication
- Simple Authentication
- Character Authentication
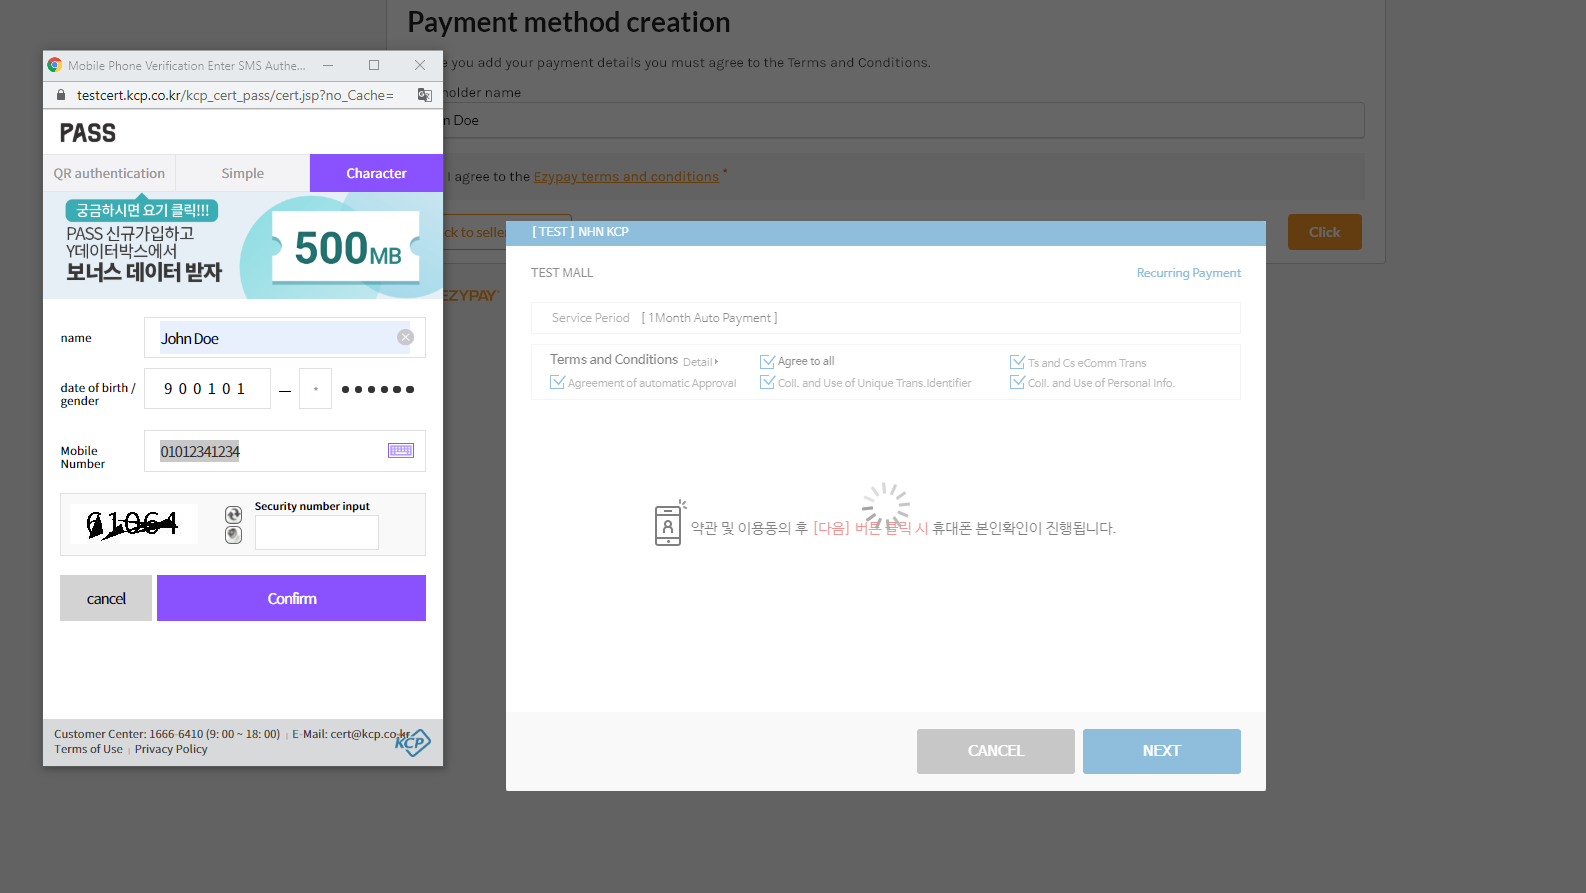
This is an example of character authentication
Step 5: Entering the One Time Password
When the type of authentication has been selected, the user will be prompted to enter their certificate number.
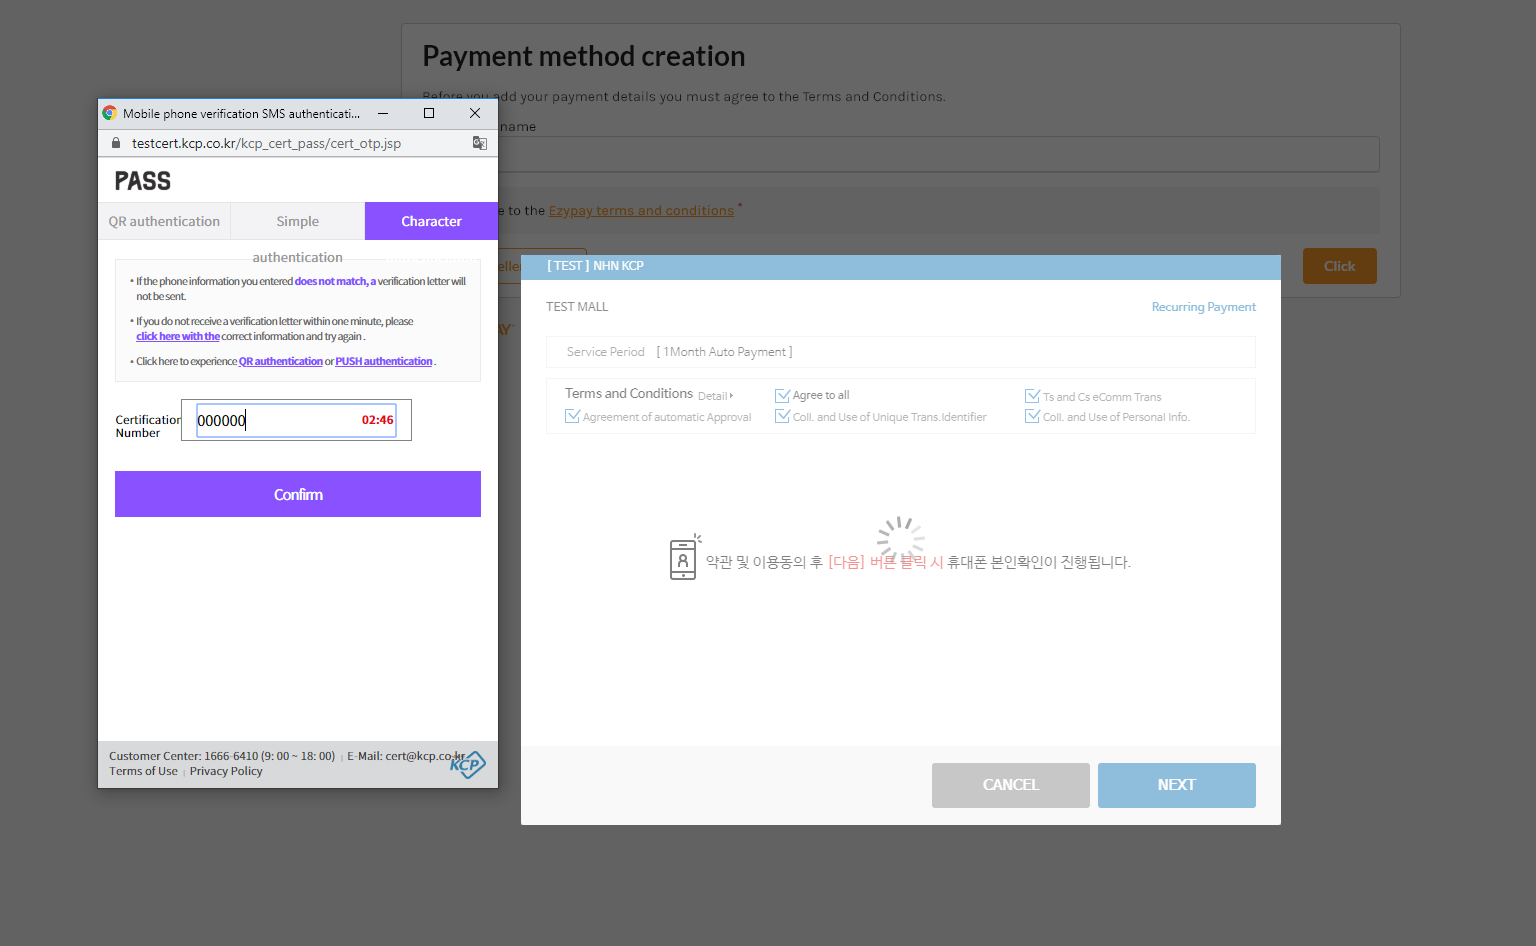
Step 5: Entering the certificate number
Step 6: Entering in Account Details
Once the credentials have been accepted, the user will be given the option to enter in their credit card details.
The details include:
- Credit Card Number
- Expiry Date (Month/Year)
- Date of Birth
The user will be required to click "Next" to proceed to the next step.
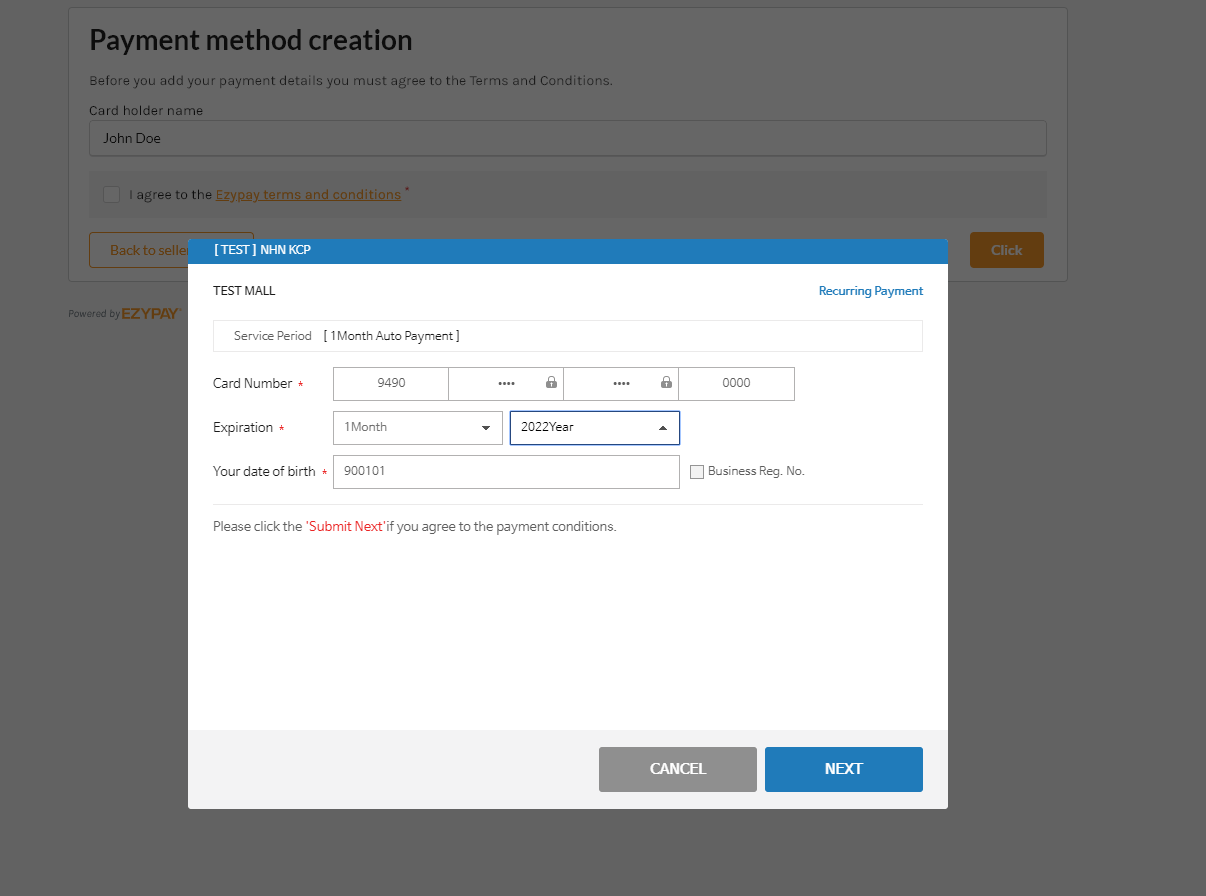
Step 6: Capturing the credit card details
Step 7: Completion of the Sign Up Process
When the user clicks next, the entered information will be processed, and the account details will be created.
- If the payment method has been created successfully, the screen will show "Success" before being redirected success URL.
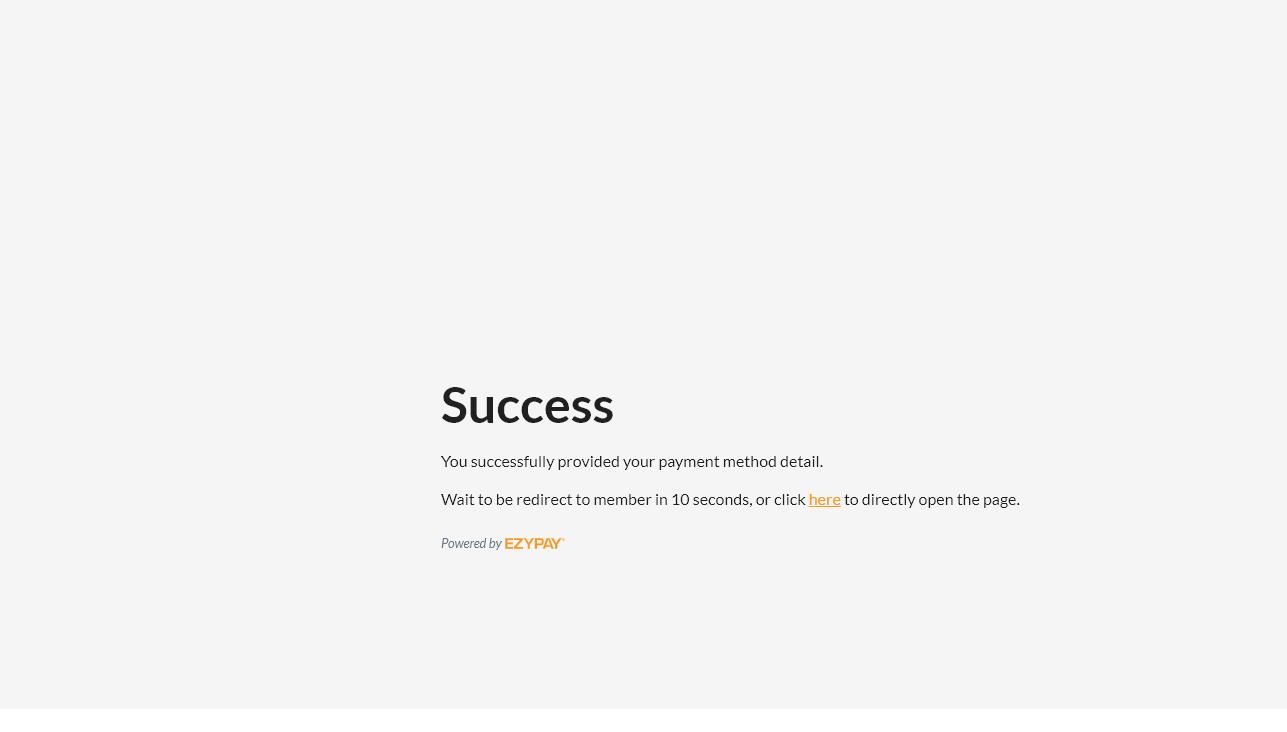
An example screenshot of a successful payment method creation
- If the payment method creation was unsuccessful, the user will be redirected to a results page with an error message.
At this point, a customer is given the opportunity to try and enter in their account details again.
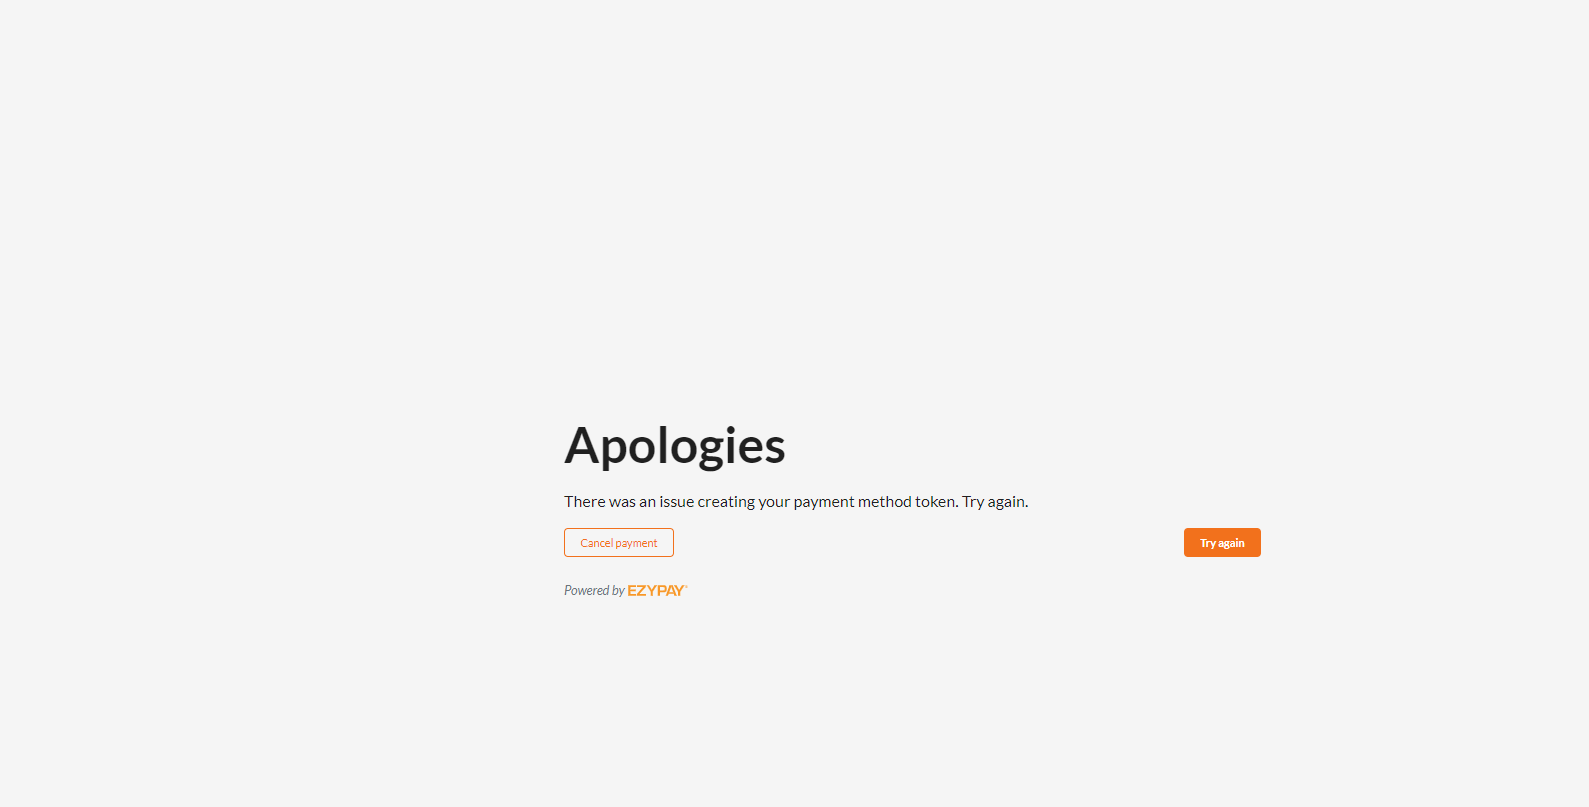
An example screenshot of an unsuccessful payment method creation
Updated 4 months ago