Adding Security Token To The Webhooks
Adding the security token to all webhooks event.
1. Create a Webhook List
[POST] https://api-sandbox.ezypay.com/v2/webhooks
Important Note:
- Add the clientKey when the webhooks are created
{
  "url": "https://enf9hqlm18rsh.x.pipedream.net/",
  "eventTypes": [
    "invoice_created"
  ],
  "clientKey": "08324116-c671-4ea8-9531-d8e69bc170f1"
}
{
    "url": "https://enf9hqlm18rsh.x.pipedream.net/",
    "eventTypes": [
        "invoice_created"
    ],
    "id": "2c4e8865-1e9f-4dcb-88d4-c36f3cc9ea83",
    "createdOn": "2019-07-12T06:55:54.526"
}
NOTE
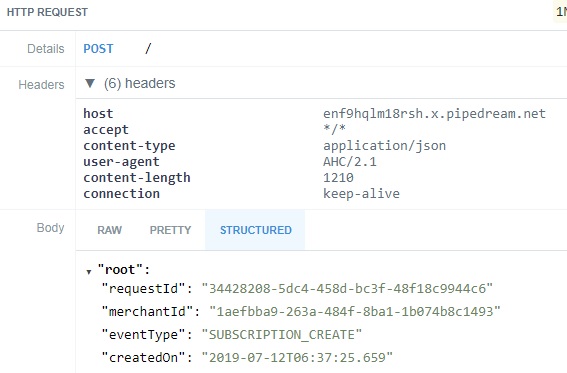
Image below is before the security token is added on the webhook. The X-Ezypay-Signature will not appear in the webhook event header.

NOTE
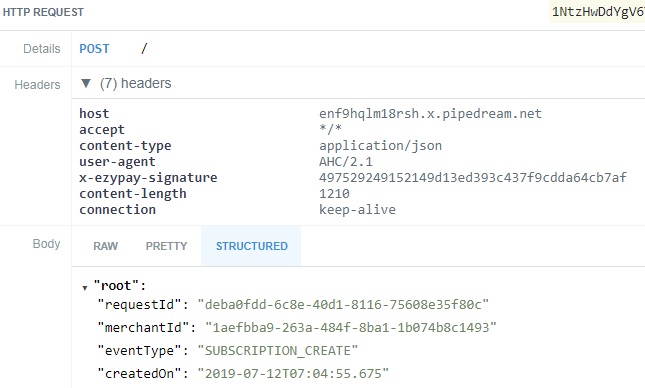
Below is how the webhook event header will look like. Keep a lookout for the X-Ezypay-Signature
The 497529249152149d13ed393c437f9cdda64cb7af is the HMAC SHA-1 for the clientKey "08324116-c671-4ea8-9531-d8e69bc170f1"

NOTE
The Webhook security can also be added using the update webhook feature. That's shown in step 2.
2. Update Webhook With Security Key
[PUT] https://api-sandbox.ezypay.com/v2/webhooks/{{webhook_Id}}
Important item here:
- updateSecurity must be set to "true"
- updatedClientKey must be set " 08324116-c671-4ea8-9531-d8e69bc170f1"
{
  "url": "https://enf9hqlm18rsh.x.pipedream.net/",
  "eventTypes": [
    "invoice_created"
  ],
  "updateSecurity": true,
  "updatedClientKey": "08324116-c671-4ea8-9531-d8e69bc170f1"
}
{
    "url": "https://enf9hqlm18rsh.x.pipedream.net/",
    "eventTypes": [
        "invoice_created"
    ],
    "id": "2c4e8865-1e9f-4dcb-88d4-c36f3cc9ea83",
    "createdOn": "2019-07-12T06:55:54.526"
}
Updated 4 months ago