Sandbox: Apple Pay Integration
When testing Apple Pay in the sandbox environment, follow the steps outlined below to perform your simulations. Choose from below based on how you have integrated.
Apple Pay does not work with plain
localhost. For local testing - use a secure HTTPS domain instead—either by mapping a local domain to your machine and serving it over TLS, or by exposing your local environment through a public HTTPS tunnel (for example, ngrok) for testing.
Register a Test Account with Apple
Before testing Apple Pay functionality, integrators must use an Apple Sandbox Tester account created in App Store Connect. Apple Pay cannot be tested using a standard Apple ID.
To get started:
- Share the tester email address with Ezypay.
- Ezypay will register this email in the Apple sandbox environment under the Ezypay configuration.
- Once completed, Ezypay will share the tester login credentials to you.
On your test device:
- Sign out of your current Apple ID (iCloud).
- Sign in using the sandbox tester account credentials.
- Add a test card to Apple Wallet and proceed with Apple Pay testing.
Apple requires that sandbox testing be performed on a real Apple device that supports Apple Pay.
- Ezypay recommends using a separate test device for Apple Pay sandbox testing to avoid conflicts with personal Apple IDs.
- Set the test device region to Australia.
- The sandbox tester email must not be associated with any existing Apple Account or previously used for App Store or iTunes purchases. For more details on sandbox tester requirements and limitations, refer to
Apple Pay Sandbox Testing
Add Payment Method
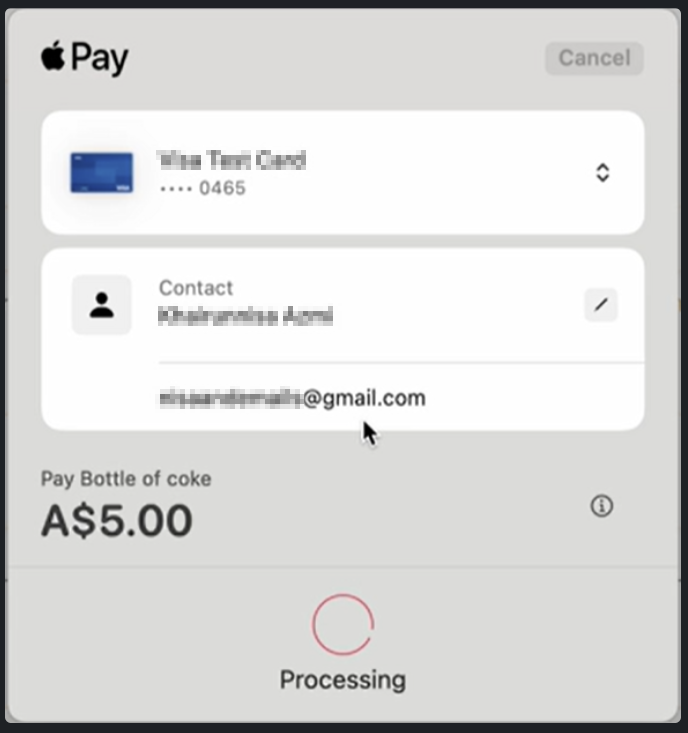
On the payment capture page, expand the Apple Pay accordion and click the Apple Pay button to begin the flow..
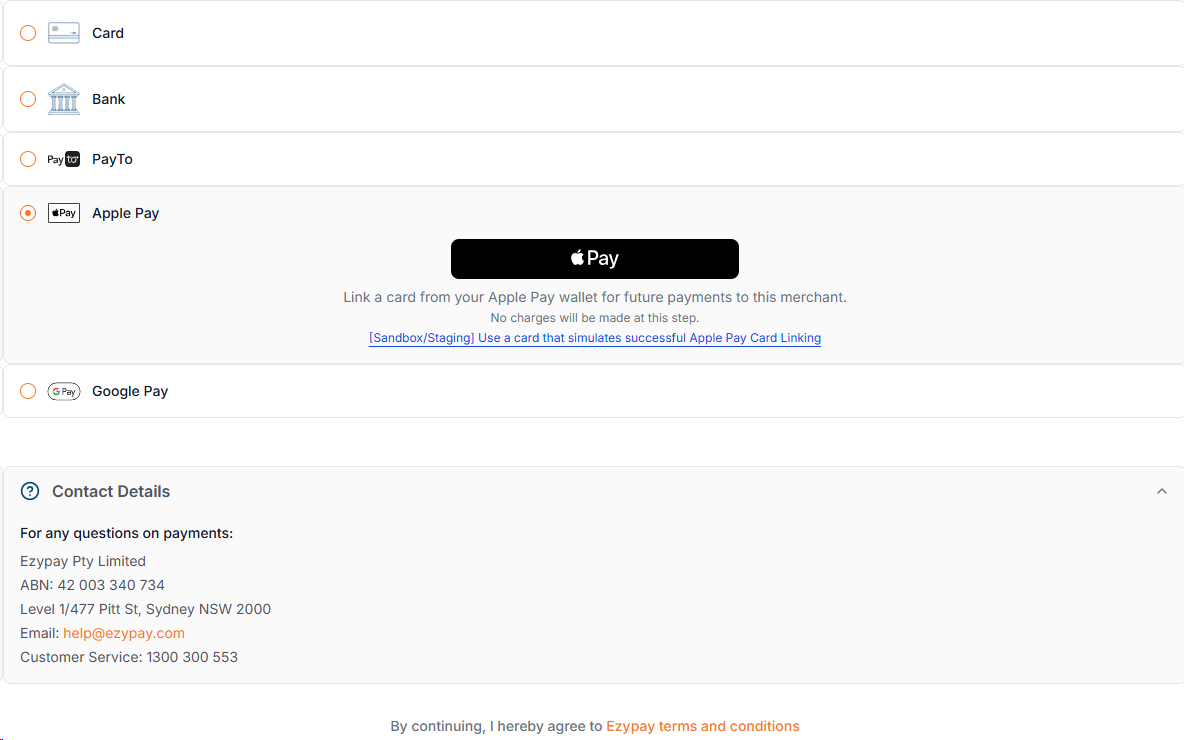
- On a supported Apple Pay device
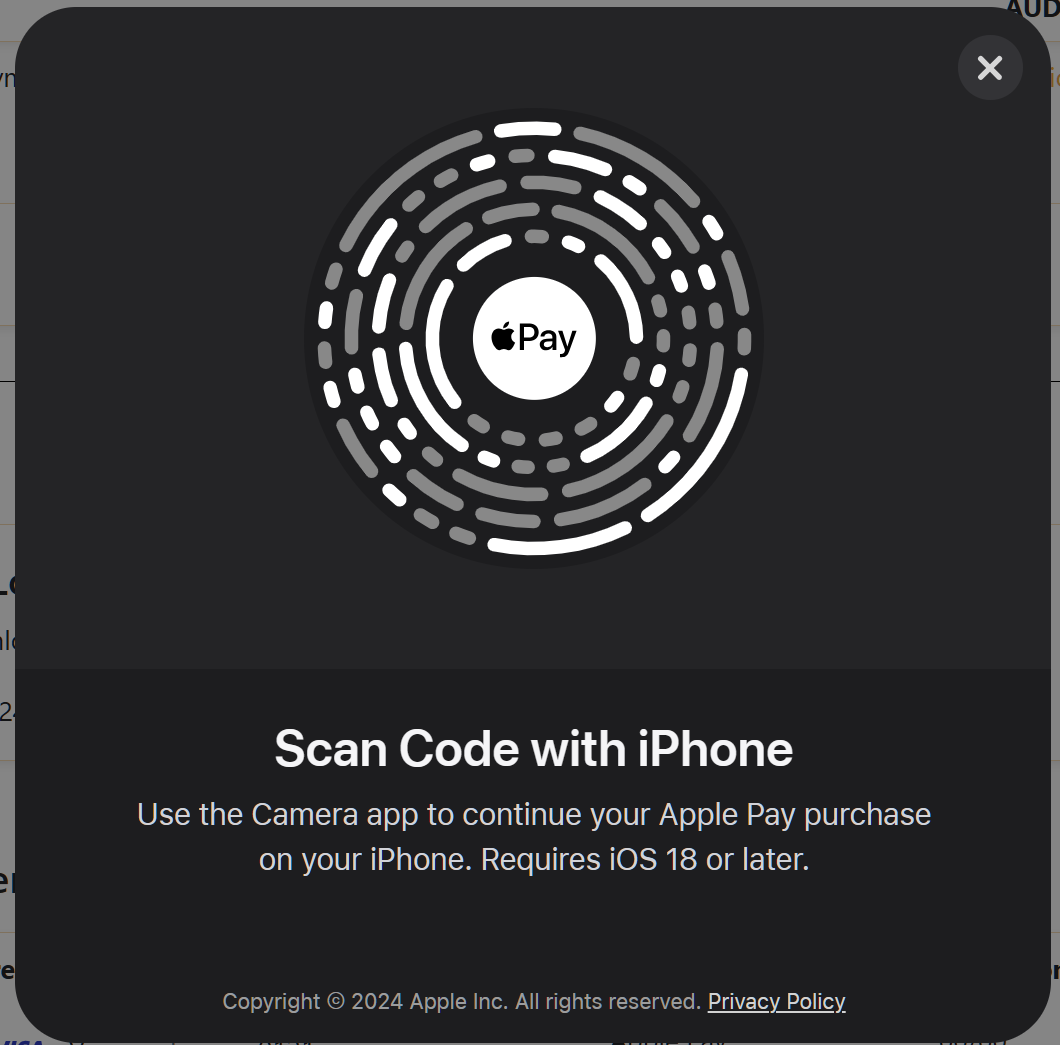
The Apple Pay payment sheet will appear, displaying the subscription details. - On an unsupported device
An Apple Pay QR code will be displayed. Scan the QR code using the Apple Pay app on a supported Apple device to continue. - [Sandbox] Use the Apple Pay simulation function to bypass the need for an Apple device.
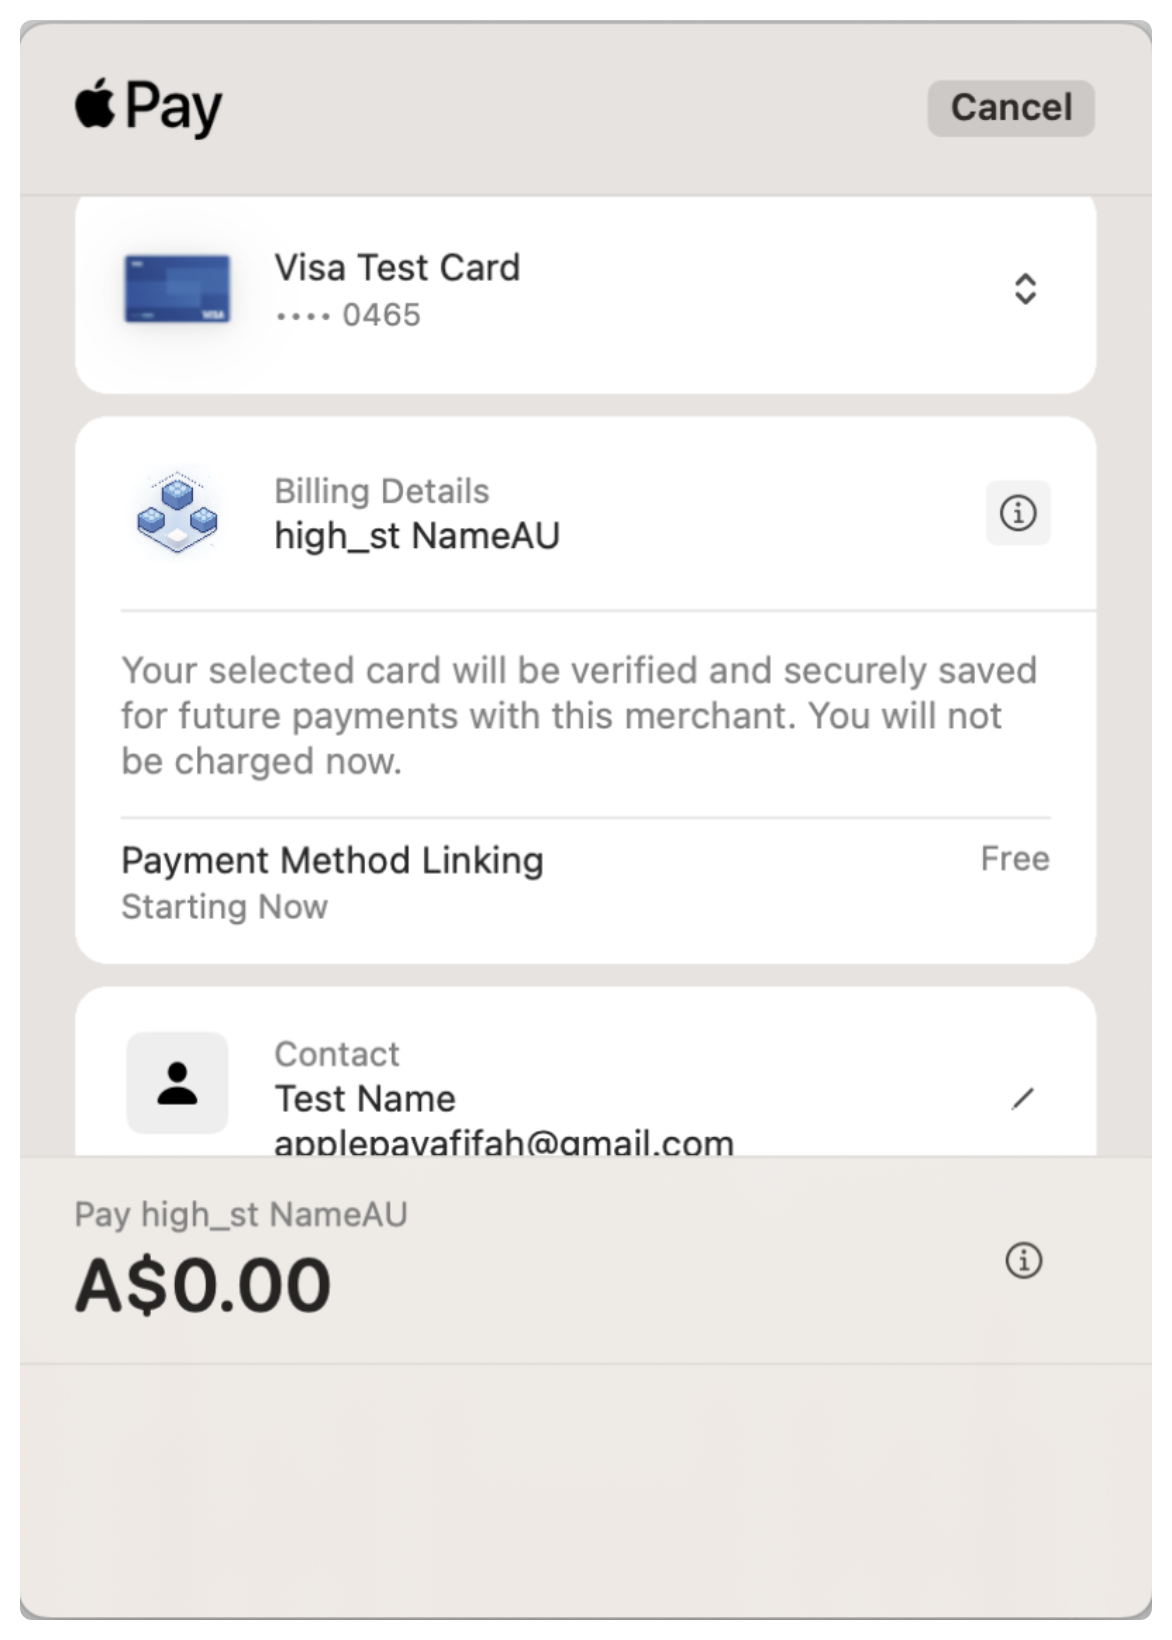
Approve the process as prompted in your Apple device and submit the Payment capture page after that. After that you are free to use the linked Apple Pay for any payments.
You may notice that no amount is shown in the Apple Pay payment sheet. This is expected behavior. At this stage, the flow is only linking the payment method for the recurring payments, and no charge is made during this step.
Initiate payment
On the checkout page, click "Pay with Apple Pay."
You will see options to simulate the result of the payment, as shown in the screenshot below:
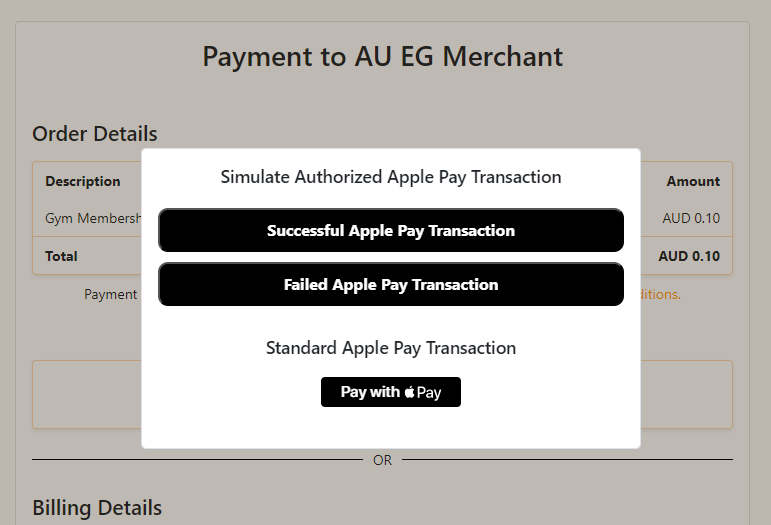
In the production environment, this step is skipped. You'll be redirected directly to link your Apple Pay.
Choose simulation result
- Select "Successful" to simulate a successful Apple Pay transaction.
- Select "Failed" to simulate a failed transaction.
- A default Apple Pay payment method will be returned in the response based on your selection.
Alternative: link Apple Pay
Click on "Pay with Apple Pay" again to open a pop-up that allows you to link an actual Apple Pay method via scanning.
If you access the checkout page with an iPhone, you'll be automatically redirected to the Apple Pay application.
Complete the transaction on iPhone
Once redirected to the Apple Pay app, choose a card and attempt to make the payment.
⚠️ Even in sandbox, real cards may be charged depending on the Apple Pay setup
Updated 5 days ago